Guide
How to apply self-adhesive film to glass — step by step
Short answer: clean the glass thoroughly, spray it with water and a drop of dish soap, apply the film wet, and squeegee the water and air out from the center toward the edges. The wet-application method gives you time to adjust before the adhesive fully bonds.
Published August 1, 2026 · drukwroclaw.pl
Quick pick
- ✓ Small surface, one person: DIY application is realistic
- ✓ Large storefront, precise pattern (e.g. frosted-effect film): consider <a href="/en/services/window-graphics/" class="text-orange-600 hover:text-orange-700">professional installation</a>
- ✓ Outdoor application: needs roughly 10°C (50°F) or above and no rain
- ✓ Indoor application: possible year-round, regardless of outdoor weather
What you'll need for DIY application
- • Application fluid — water with a small amount of dish soap, in a spray bottle
- • Squeegee (felt or rubber edge) to push out air and water
- • Sharp utility knife or scalpel for trimming edges
- • Soft, lint-free cloth or paper towel
- • Painter's tape for temporarily positioning the film
- • Hair dryer or heat gun (useful for creases around curves)
Step 1 — prepare the glass
Clean the glass thoroughly, ideally with an alcohol-free cleaner, and remove any leftover stickers, tape, or adhesive residue — best done with a blade scraper held at a shallow angle so you don't scratch the glass. Film applied to a dirty or greasy surface will peel faster regardless of its quality. Finish by wiping the glass with a dry, clean cloth to avoid leaving lint behind.
Step 2 — prepare the film and the site
Measure the window and add a few centimeters of margin on each side for trimming after application — it's easier to cut off excess than to stretch film that falls short. If the design has a specific orientation (e.g. a logo or text), mark the top of the film with painter's tape before unrolling it — an orientation mistake is much harder to catch after the film is already applied. Lay the film out on a clean, flat surface beforehand to avoid creases.
Step 3 — wet application
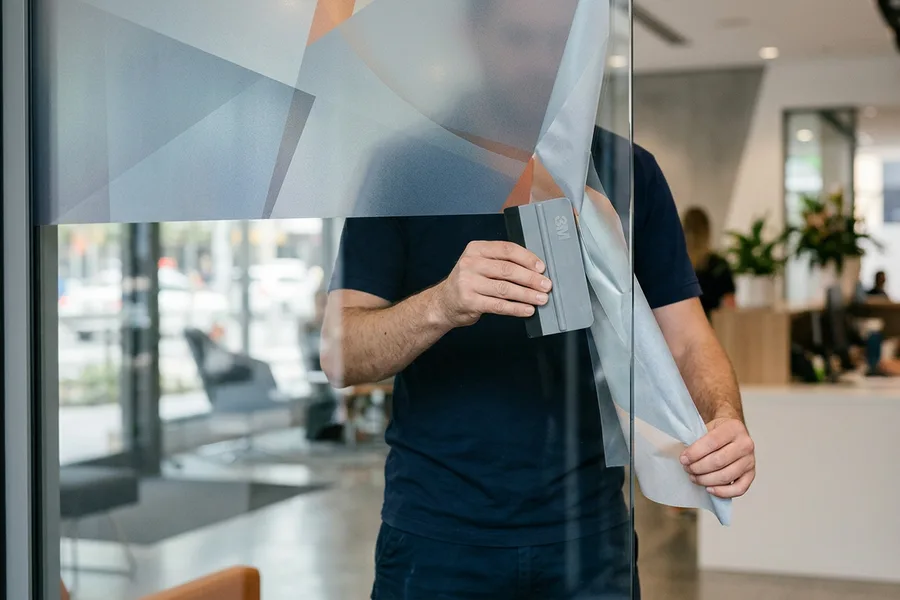
Spray the glass generously with the water-and-soap mixture — the water layer lets you slide the film across the surface without it sticking immediately. Partially peel back the adhesive liner, spray the adhesive side as well, then position the film against the glass, starting from one corner. Use the squeegee to push water and air out from the center toward the edges and from top to bottom — not side to side, which can trap air in the corners. Work in sections, gradually peeling back more of the liner as you go.
Step 4 — trim the edges and finish
Once the film is fully pressed down, wait briefly for excess water to run off, then trim the overhang with a sharp knife guided close to the window frame. Trimming while the film is still damp gives a cleaner edge than trimming once it's dry. Finish with one more pass of the squeegee across the whole surface to remove any remaining water underneath, then let it dry — the adhesive typically takes a few days to fully cure, so avoid washing the window during that time.
When professional installation makes more sense
For large storefronts (several square meters in one piece), patterns that require precise positioning (e.g. printed frosted-effect film), or installation at height, the risk of a failed application grows faster than the labor savings — one ruined meter of film means wasted material and reordering. In these cases, <a href="/en/services/window-graphics/" class="text-orange-600 hover:text-orange-700">professional installation</a> usually works out cheaper than a second DIY attempt.
Not sure you can do it yourself? Contact us — we'll advise.
Common mistakes in DIY film application
- • Not using enough water during application. Dry or nearly dry film sticks the instant it touches the glass, leaving no room to adjust — misalignment is hard to avoid at that point.
- • Squeegeeing in the wrong direction. Working from the edges toward the center pushes air deeper under the film instead of removing it — always work from the center outward.
- • Applying in the wrong temperature or humidity. Below roughly 10°C, outdoor adhesive won't bond properly, and the film becomes stiff and hard to shape.
- • Washing the window too soon after installation. The adhesive needs several days to fully cure — early cleaning, especially with a pressure washer, can lift the film's edges.
- • Trimming once the film has fully dried. Dry film is more sensitive to small knife slips and produces a rougher edge than film trimmed while still damp.
FAQ — self-adhesive film installation
Can film be applied without prior experience?
On small to medium surfaces — yes, the wet-application method allows enough time for adjustments. For large storefronts or precise patterns, professional installation is worth considering.
What temperature is needed for outdoor installation?
Generally at least around 10°C (50°F) and dry conditions during application. Indoors, film can be applied year-round regardless of outdoor weather.
How long does the film take to dry after installation?
The adhesive typically cures fully within a few days. Avoid cleaning the window during that time, especially with a pressure washer.
What should I do about air bubbles under the film?
Small bubbles often disappear on their own within a few days as the adhesive cures. Larger ones can be carefully pricked with a needle and pressed out with a squeegee, as long as the film hasn't fully dried yet.
Can incorrectly applied film be removed and reused?
While still fresh and wet — usually yes, if you act right away. Once the adhesive has fully cured, the same sheet generally can't be removed and reapplied without damage.
Choose your film and check the price
Enter your window dimensions in the calculator for your chosen film and see the current material cost — with or without professional installation.